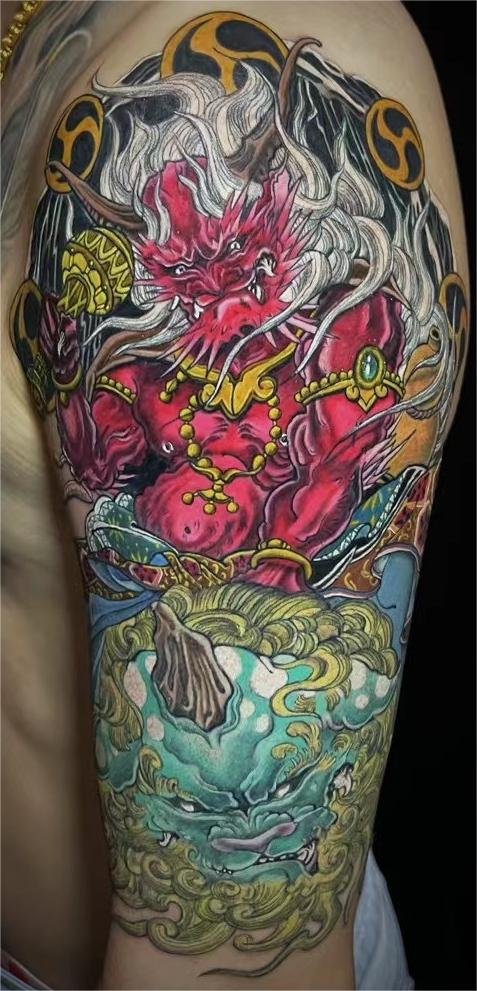
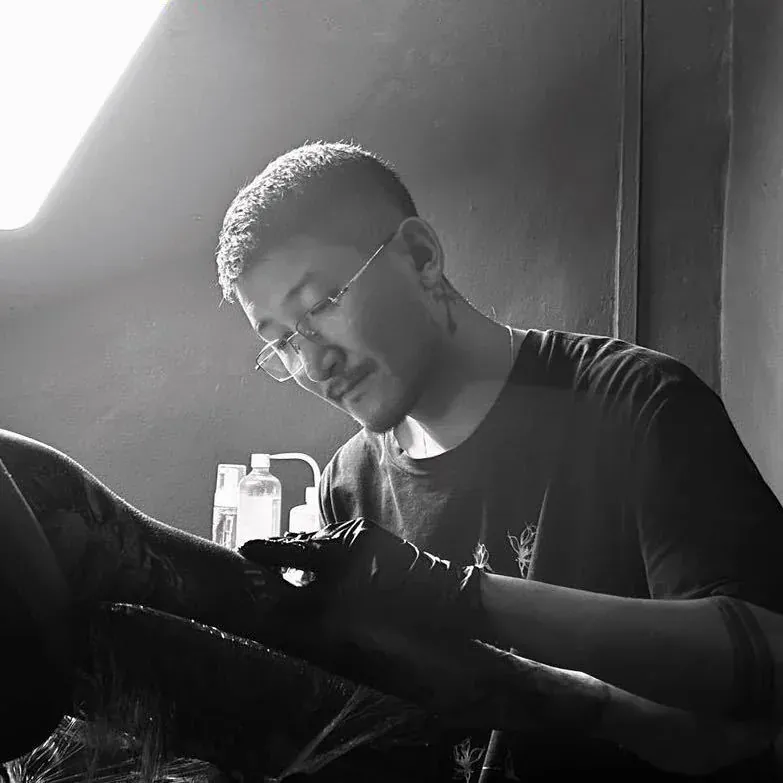
A full sleeve tattoo in Singapore can be built as one connected composition or as a collection of separate pieces that share an arm. The better choice depends on what you want the finished sleeve to say, how much direction you want to give the artist, and whether you already have tattoos that must stay. Both routes can look strong; neither is automatically superior.
What “unified,” “patchwork,” and “hybrid” sleeves actually mean
A unified sleeve is designed as a single composition from shoulder to wrist. One subject or one story leads, and everything else — secondary images, background, filler — exists to support it. The arm reads as one artwork, the way a Japanese irezumi sleeve flows from chest panel to wrist along the muscle contours of the arm. The pictorial tradition behind that flow took shape in Edo-period Japan, built largely on the woodblock prints of Utagawa Kuniyoshi from the late 1820s.
A patchwork sleeve is a collection of standalone tattoos placed on the same arm over time. Each piece is chosen for its own meaning or moment, and the arm becomes a record rather than a single image. There is no requirement that the pieces relate to each other. The gap between pieces, and how those gaps are later handled, is what separates a deliberate patchwork from an accidental one.
A hybrid sleeve sits between the two. You might start with a few meaningful pieces and later ask an artist to tie them together with shared background, wind, smoke, or filler motifs. The original tattoos stay readable, but the arm gains a unifying layer. This is the most common real-world path, because most people do not arrive with a finished plan — they arrive with two or three tattoos and a question.
Unified vs patchwork: comparing the two design routes
The two routes answer different questions. A unified sleeve answers “what should this arm look like as a whole?” A patchwork sleeve answers “what belongs on this arm next?” Neither question is wrong; they just produce different arms.
| Design dimension | Unified sleeve | Patchwork sleeve |
|---|---|---|
| Visual hierarchy | One main subject dominates; secondary elements support it | Each piece is its own focal point; no single subject leads |
| Transitions | Background, wind, smoke, or pattern bridges every gap | Negative space between pieces is part of the design, or is filled later |
| Planning load | Front-loaded: composition is decided before the first session | Ongoing: each new piece is chosen when you are ready |
| Existing tattoos | Must be worked into the composition or covered | Can stay as-is; new pieces are placed around them |
| Background consistency | One background treatment across the whole arm | Background varies or is absent; consistency is optional |
| Risk | If the early composition is weak, later sessions inherit it | If pieces are placed without thought, the arm can read as cluttered |
| Best for | A clear story, a single style, a large-scale tattoo project you plan from the start | A life recorded in moments, mixed styles, adding over years |
The comparison is about design goals, not quality. A well-placed patchwork sleeve with confident negative space can look better than a rushed unified sleeve with a weak centre. A unified sleeve with a strong composition and clean flow can look better than a patchwork arm where every piece fights the next. The outcome depends on the planning, not the label.
Sleeve tattoo flow: why hierarchy and transitions matter
Sleeve tattoo flow is how the eye moves across the arm. In a unified sleeve, flow is designed: the artist controls where the eye lands first, where it travels, and where it rests. A main subject usually sits on the outer arm or the shoulder, where the canvas is widest and most visible. Secondary elements lead away from it, and background carries the eye across gaps without hard edges.
In a patchwork sleeve, flow is either accepted or built later. If you leave clean negative space between pieces, the eye jumps from one focal point to the next, and that rhythm becomes the flow. If you later add filler — small motifs, dots, geometric repeats, or shared texture — you create transitions without forcing the pieces into one story.
The most common flow problem is not patchwork itself. It is patchwork placed without any thought for the next piece. A tattoo that runs to the edge of the inner elbow, for example, leaves no room for a transition into the forearm. A dark piece placed next to where a future light piece is planned can throw off the balance of the whole arm. Planning flow does not require a finished design; it requires knowing where you want the eye to go and leaving room for that to happen.
Planning around the elbow, inner arm, and shoulder
The arm is not a flat rectangle. It bends, twists, and stretches, and the skin over its joints is thin, loose, and moves constantly. The inner elbow (antecubital fossa) is one of the highest-distortion zones on the body, along with the back of the knee and the armpit, because it experiences the greatest range-of-motion stretch. The elbow itself presents a particular challenge: the skin is thin and loose, the olecranon bone sits close to the surface, and veins cross the inner elbow, adding visibility and sensation.
Shoulder and upper arm
The shoulder and upper arm carry thicker skin and more subcutaneous fat, which makes them relatively forgiving for dense work and solid colour. This is where a unified sleeve often places its largest subject, because the canvas is broad and the surface is stable. For a patchwork sleeve, the shoulder is a strong spot for a standalone piece that you want to read clearly.
The elbow
The elbow is a transition point in any sleeve. In a unified composition, background or secondary motifs usually wrap around the elbow rather than placing a hard-edged subject directly on the joint, because the skin there stretches and distorts with every bend. In a patchwork sleeve, the elbow is best treated as a natural break: place a piece above it, a piece below it, and let the joint sit in negative space or in light filler. Loading the elbow with a detailed focal subject is the most common cause of a sleeve that looks cramped and ages poorly.
Inner arm
The inner arm carries thinner skin, more nerve endings, and more visible veins than the outer arm. It is more sensitive to tattoo, and it is also more prone to spreading over time. For both routes, the inner arm is better suited to softer elements — background, smoke, water, lighter linework — than to the sharpest detail in the sleeve. If you have an existing tattoo on the inner arm, tell your artist early, because it constrains what can flow around it.
Working with existing tattoos and planning future expansion
Most sleeves are not started from blank skin. You may already have one or two tattoos on the arm, and the question is whether to build around them, tie them in, or cover them. This decision shapes the whole project.
If you are building a unified sleeve, existing tattoos are either incorporated into the composition or covered. Incorporating means the artist designs around them, treating them as fixed points and routing background and flow to include them. Covering means laser removal first — and Yuyi Tattoo does not offer laser removal, so that would need to be done elsewhere before any cover-up work begins. Be honest with your artist about which path you want, because it changes the brief entirely.
If you are building a patchwork sleeve, existing tattoos simply stay. New pieces are placed in the open space, and the gaps between old and new are either left as negative space or filled later with small connecting motifs. The only planning rule is to avoid boxing yourself in: leave room around the elbow, the wrist, and the shoulder so future pieces have somewhere to go.
A hybrid sleeve often starts here. You bring existing tattoos, and you and the artist decide together whether to unify them with a shared background or to keep them as a collection and add new pieces around them. This is a good moment to plan a large-scale tattoo project with someone who can see the whole arm, not just the next piece.
Colour, black-and-grey, and background consistency
A sleeve reads as one artwork when its background and palette are consistent. This is true for both unified and patchwork sleeves, though the demands are different.
Colour vs black-and-grey
A full colour sleeve needs a shared palette. If one piece is saturated and warm and the next is muted and cool, the arm looks disjointed even if each piece is well executed. Planning colour means choosing a dominant palette early and sticking to it, or accepting that later pieces will need to be adjusted to match. Black-and-grey is more forgiving across pieces, because the tonal range is narrower, but it still needs consistent contrast — a piece that is packed solid black next to a piece that is soft and grey will read as two different sleeves on one arm.
Yuyi’s strongest work is in black-and-grey realism, portrait realism, and large-scale compositions, so a black-and-grey unified sleeve or hybrid is well within his range. You can view Yuyi’s tattoo work to see how he handles tone and flow across large surfaces.
Background consistency
Background is what makes a sleeve feel finished. In a unified sleeve, one background treatment — wind, smoke, water, geometric pattern, or solid tone — runs across the whole arm and bridges every gap. In a patchwork sleeve, background is optional per piece, but if you want the arm to read as a collection rather than a scatter, a shared background added at the end is the simplest way to tie it together. This is the core of the hybrid route: keep your pieces, add one unifying layer.
The most common background mistake is adding it piece by piece in different styles. Smoke on one piece, dots on the next, and a solid black fill on a third will never read as one sleeve, no matter how good each piece is. Decide the background treatment before you start, or plan to add it in one dedicated stage at the end.
Staged work: building a sleeve over time without fixed promises
A full sleeve is almost always built in stages. The arm is too large and the healing process too demanding to finish in one sitting. Tattooing is a controlled wound to the mid-dermis: the needle deposits ink roughly 1.5 to 2 millimetres below the surface, the epidermis sloughs initially, and the dermis rebuilds through inflammation, proliferation, and remodelling over weeks to months. Surface epidermal closure takes 48 to 72 hours, but the deeper remodelling phase continues for much longer. Healing has to finish before the next stage goes over or beside the same skin.
How many stages a sleeve takes depends on the design, the density, your skin, your pain tolerance, and your schedule. No artist can honestly promise a fixed number of sessions, a completion date, or a total cost before the design is settled and the first stage is on skin. Any quote given before that is a guess. Plan for a project that spans months, not an afternoon, and choose an artist whose work you want to live with across that whole timeline.
Staging also lets you make decisions as the sleeve grows. A unified sleeve is planned up front, but each stage still reveals how the ink heals on your skin, how the flow reads in three dimensions, and whether the composition holds. A patchwork sleeve is staged by nature — you add a piece, live with it, then decide what comes next. Either way, the arm is built over time, and the timeline is something you and your artist agree on as the project moves, not something you can lock in on day one.
Your sleeve brief: what to send before the first session
A good brief lets your artist plan the whole arm, not just the first piece. Whether you want a unified sleeve, a patchwork collection, or a hybrid, the information you send at the start is the same. The more complete it is, the less back-and-forth you need before a design can be drawn.
Send the following before any consultation:
- Whole-arm photos, four angles. Stand in good light and photograph the arm straight on from the front, back, inner, and outer sides. Keep the arm relaxed at your side, not flexed. These four photos let the artist read the canvas and see where existing tattoos sit.
- Existing tattoo photos, close up. Photograph any tattoo already on the arm, clearly lit and in focus. Note whether each one is healed and how old it is.
- Must-have subjects. List the images or motifs you definitely want on the arm — a portrait, a koi, a script, a flower, a date. Mark which are non-negotiable and which are flexible.
- Style and palette. State whether you want colour, black-and-grey, or a mix, and whether you have a reference style in mind. If you want a unified sleeve, say so. If you want a patchwork collection, say so. If you are unsure, say that too — it is a valid answer.
- Coverage goals. State whether you want the full arm covered shoulder to wrist, or whether you want to leave the inner arm, the wrist, or the elbow lighter. This shapes the composition more than almost anything else.
- What you do not want. List styles, motifs, or placements you do not want. Negative briefs are often clearer than positive ones.
When you have these ready, send Yuyi your tattoo idea through the contact page, or message directly on WhatsApp. The more complete the brief, the more useful the first conversation will be.
Sources and review date
- American Academy of Dermatology — Caring for tattooed skin — reviewed 20 August 2026.
Frequently asked questions
Is a patchwork sleeve worse than a unified sleeve?
No. A patchwork sleeve is a different design goal, not a lesser one. It records separate moments on one arm, and with confident negative space or a unifying background added later, it can read as a deliberate collection. A unified sleeve is stronger when you want one connected story; a patchwork sleeve is stronger when you want each piece to stand alone.
How do I plan a sleeve around the elbow?
Treat the elbow as a transition, not a focal point. The skin there is thin, loose, and stretches with every bend, so detailed subjects age poorly on it. Place focal pieces above and below the elbow, and let the joint carry background, light filler, or negative space. This applies to both unified and patchwork sleeves.
Can I turn my existing tattoos into a full sleeve?
Yes, and it is the most common starting point. You can build a unified composition that incorporates or covers them, or keep them as part of a patchwork collection and add new pieces around them. Send whole-arm photos and existing tattoo close-ups so your artist can see what is fixed and what is flexible.
Should my whole sleeve be one colour style?
Consistency matters more than the specific style. A full colour sleeve needs a shared palette; a black-and-grey sleeve needs consistent contrast. Mixing saturated colour with soft grey, or solid black with light tonework, makes the arm read as two sleeves. Decide the palette early, or plan to add a unifying background stage at the end.
How long does a full sleeve take to complete?
A full sleeve is built in stages over months, because each stage must heal before the next goes over the same skin. The number of sessions depends on the design, density, your skin, and your schedule. No artist can honestly promise a fixed session count, completion date, or total cost before the design is settled and the first stage is on skin.
Ready to discuss a project? Message Yuyi on WhatsApp with the subject, references, placement, approximate size and preferred timing.