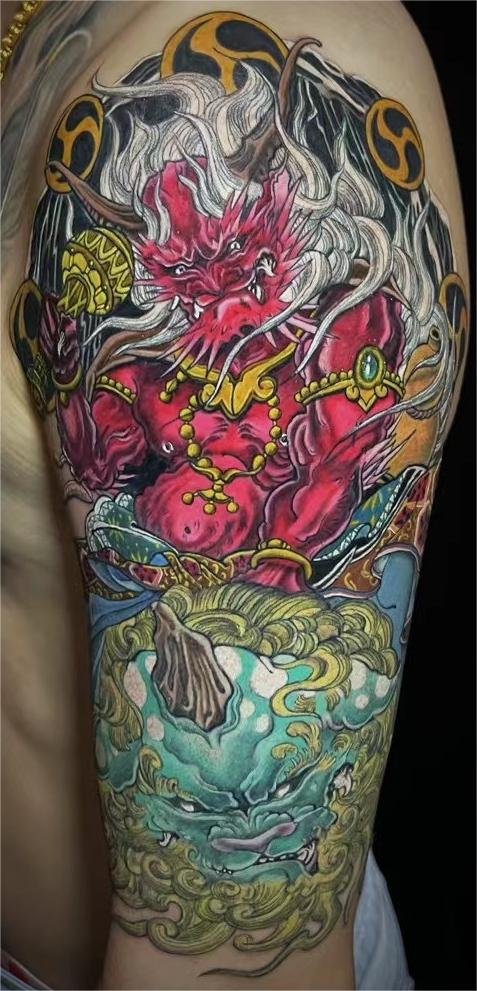
A strong Japanese sleeve tattoo is planned backwards from three decisions: how much of the arm the design will cover, which single subject leads it, and how background and bare skin will move the eye around the limb. Settle those before anything is drawn, and every later choice, from supporting motifs to colour and session order, becomes far easier to make with your artist.
Start with the scope of the sleeve
Sleeve scope describes where the design stops on your arm, not a fixed industry measurement. Studios use the same four terms, but the boundaries shift with arm length, muscle shape and where your clothing lines fall, so treat them as a shared language rather than a ruler.
| Term | Where it usually ends | What it suits |
|---|---|---|
| Quarter | Somewhere on the upper arm, often near the T-shirt line | A first large piece that stays easy to cover |
| Half | Shoulder to around the elbow, or elbow to wrist | A complete composition on one arm segment |
| Three-quarter | Shoulder to mid-forearm | Coverage that still hides under a long sleeve |
| Full | Shoulder to wrist | The classic read: one continuous scene around the limb |
Choose scope based on how visible you want the work at work, what tattoos you already have, and whether you might extend later. If a full sleeve is even a maybe, say so now. A half sleeve designed with an open background can grow downwards; a composition closed off at the hemline usually cannot. This is the foundation of Japanese tattoo sleeve planning: decide the edges before the details.
Choose one main subject, then supporting elements
A coherent sleeve has one lead motif and a small cast of supporting elements. The lead carries the meaning and occupies the largest, most visible real estate; everything else exists to direct the eye towards it or give it context.
Classic leads include the dragon, koi, phoenix, tiger, hannya mask and warrior or hero figures. Supporting elements are usually drawn from nature: peonies, cherry blossoms, maple leaves, waves, clouds, wind bars and rocks. Two or three supporting elements are plenty; more and the sleeve starts to read as a collage.
Many of these motifs entered tattooing through woodblock prints. The Museum of Fine Arts, Boston describes how Kuniyoshi’s print series One Hundred and Eight Heroes of the Popular Water Margin (about 1827–30) is credited, in tattooers’ oral tradition, with giving rise to the fashion for extensive pictorial tattoos. The Metropolitan Museum of Art holds a Kunisada print of the hero Shi Jin, whose spectacular nine-dragon tattoo earned him the nickname “Nine Dragoned”. That is the documented history. The meanings below are traditional readings, not fixed rules:
- Dragon: wisdom, protection and command of water; a guardian rather than a destroyer
- Koi: perseverance, from the East Asian legend of the carp that leaps the Dragon Gate waterfall and transforms into a dragon
- Cherry blossom: impermanence; the Library of Congress notes the blossoms are read as a metaphor for the ephemeral beauty of living because they bloom so briefly
- Peony: bravery and good fortune, often used to soften a fierce lead subject
Pick the lead motif for what you want the sleeve to say, then check that you like how it moves. Dragons and koi coil naturally around a limb; masks and faces are static and need background to carry them. You can explore Japanese and Asian-inspired tattoos in Yuyi’s portfolio to see how different subjects sit on real arms.
How a Japanese sleeve tattoo flows around the arm
Japanese tattoo flow is the path the eye follows when someone looks at your arm, and a sleeve is always viewed in the round. Good flow means the composition spirals with the limb’s natural lines, so the design reads from the front, the side and the back without a dead angle.
Direction does the heavy lifting. A dragon ascending towards the shoulder reads differently from one diving towards the wrist, and a koi angled upstream against the bicep reads as effort. Decide which way the lead subject’s energy should travel, then let supporting elements echo that direction: waves breaking the same way, petals drifting along the same current.
Hierarchy keeps the flow legible. The lead motif takes the outer upper arm or outer forearm, the surfaces people actually see when your arm hangs relaxed. Supporting elements sit smaller and quieter around it, and the background runs at the smallest scale of all. If everything competes at the same size, the eye has nowhere to land and the sleeve turns to noise.
Background, negative space and the elbow
Background is what turns separate tattoos into a sleeve. In Japanese work, the clouds, waves and wind bars behind the subject, often called gakubori, tie every element together, while negative space gives the eye somewhere to rest.
Negative space is not wasted skin. Untattooed gaps between motifs create the contrast that makes the black and colour readable from across a room, and they leave the design room to breathe as it ages. A sleeve packed edge to edge tends to blur into a single dark mass within years.
The elbow is where most sleeves succeed or fail. The joint creases, stretches and twists, so dense detail placed in the elbow ditch distorts every time you bend your arm. Experienced planning carries spirals, water or falling petals across the joint instead, and keeps the point of the elbow simple. The same logic applies to the inner arm, where the skin is softer and seen less often: save your finest detail for the outer surfaces.
Colour versus black and grey
Traditional Japanese sleeves use a restrained, bold palette built on black with red, green and yellow accents, while black and grey relies on shading alone. Neither is more authentic; the right choice depends on your subject, your skin tone and how you want the piece to age.
| Colour | Black and grey | |
|---|---|---|
| Reads from a distance | Strong and graphic | Softer, more atmospheric |
| Suits | Classic bold motifs with strong outlines | Realism-influenced shading and quiet transitions |
| Ageing | Holds well if sun-protected | Contrast softens gradually and evenly |
| Decision driver | Subject and personal taste | Subject and personal taste |
Whichever you choose, sun is the enemy. The American Academy of Dermatology advises protecting tattooed skin with a broad-spectrum SPF 30 or higher, because UV light fades tattoo ink. That matters year-round in Singapore, not just at the beach.
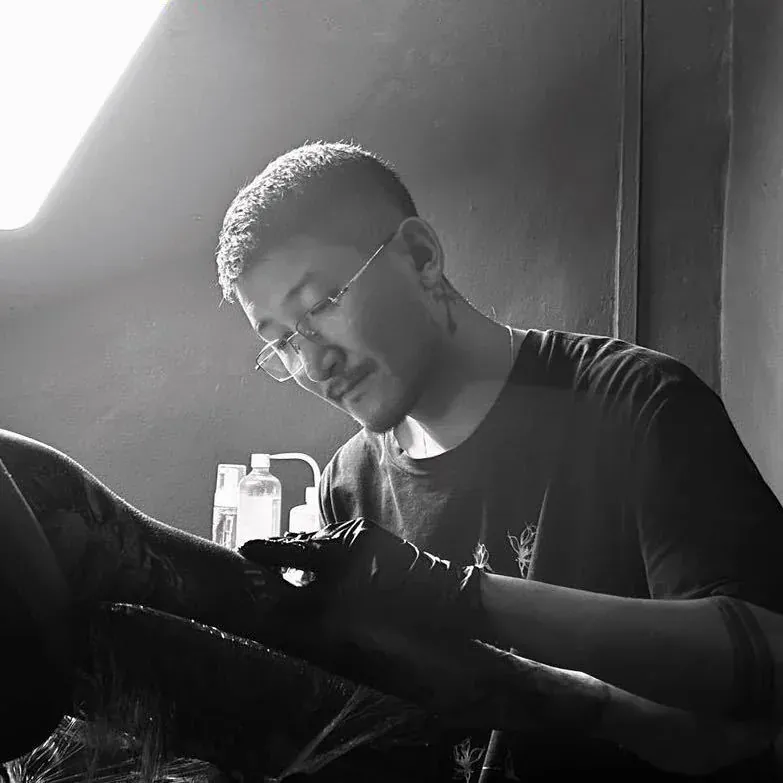
Yuyi’s documented strengths include black-and-grey realism and Japanese and Asian-inspired compositions, so for his chair this is a genuine design conversation rather than a house default. Bring healed reference photos of both approaches and decide on evidence, not on what is trending.
Building the sleeve across sessions
A full sleeve is built in stages, and no honest artist will promise a fixed session count before the design exists. How many sittings you need depends on coverage, detail, colour, how your skin takes ink and how you heal, so the plan below is about order, not numbers.
- Consultation and references. Share photos of your whole arm, any existing tattoos, your main motif and your preferred coverage.
- Design and mapping. The composition is drawn to your arm’s actual measurements, with revision rounds before any needlework.
- Outline first. Linework usually goes down in the early sittings, starting with the lead motif’s placement.
- Background and shading. The gakubori and shading connect the composition into one piece.
- Colour passes. If you choose colour, it is layered in after the shading has settled.
- Lower arm and elbow. The forearm taper and the elbow are finished once the upper arm reads clearly.
- Heal, review, adjust. Each stage heals fully before the next begins, and the plan adapts to how your skin responds.
Space your sittings so the skin recovers properly between them, and follow your artist’s aftercare guidance each time. If you are thinking beyond the arm to a back piece or chest panel later, it is worth reading how to plan a large-scale tattoo project before you fix the sleeve’s boundaries.
Your consultation checklist
A useful consultation is mostly preparation you do at home. Arrive with the following and the conversation becomes concrete very quickly.
- Clear photos of your whole arm: front, back and both sides, relaxed and slightly flexed
- Photos of any existing tattoos on or near the arm, even small ones
- Two or three references for your main motif, with a note on what you like about each
- Your preferred coverage and where you want the design to stop
- A colour or black-and-grey leaning, supported by one healed example image
- Practical notes: your work dress code, sun exposure, and sports that stress the skin
- Questions about process: how the design will be mapped, what gets tattooed first, and how stages are spaced
Ask to see healed large-scale work, not only fresh photos. Yuyi trained at the LuXun Academy of Fine Arts and has tattooed since 2010; his recorded awards include Best of Day (Saturday) at The Lion’s Gate Singapore Tattoo Convention 2024, and first place for Best Big Realism Pattern at Tattoo Show Taipei 2017. When you are ready, send Yuyi your tattoo idea and the planning can begin.
Sources and review date
- Museum of Fine Arts Boston — Tattoos in Japanese Prints — reviewed 20 August 2026.
- Library of Congress — Cherry blossoms in Japanese cultural history — reviewed 20 August 2026.
- American Academy of Dermatology — Caring for tattooed skin — reviewed 20 August 2026.
Frequently asked questions
How long does a Japanese sleeve take to finish?
There is no honest fixed answer. A sleeve is built in stages, and the total depends on coverage, detail, colour, how your skin takes ink and how you heal between sittings. Large work normally spans months rather than weeks. Once your design and scope are set, your artist can give a realistic estimate for your arm, not a generic number.
Should the koi on my arm swim up or down?
Traditionally, a koi swimming upstream is read as a struggle still in progress, a sign of perseverance. A koi heading downstream is often read as a goal already achieved. These are interpretations, not rules, and many wearers choose direction for compositional reasons. What matters most is that the fish moves with the flow of your arm.
Is colour or black and grey better for a Japanese sleeve?
Neither is inherently better. Colour suits classic motifs with bold outlines and reads strongly from a distance. Black and grey suits realism-influenced shading and quieter transitions, and it ages with soft, even contrast. Both fade under UV, so sun protection matters either way. Decide from healed reference photos you love and how each approach sits on your skin tone.
Can I start with a half sleeve and extend it later?
Yes, but only if you plan for it from day one. Tell your artist that a full sleeve is possible, and they will keep the background open near the elbow and avoid closing the composition at the hemline. Extending a sleeve that was designed as finished is much harder, and the join usually shows.
How much does a Japanese sleeve cost in Singapore?
There is no standard figure, because large work is priced around scale, detail, colour and how the sittings are structured. Be cautious of anyone quoting a total before seeing your arm and references. At consultation, ask how the studio structures payment for staged work and what each stage includes, so you can budget step by step.
Can a new sleeve work around my existing tattoos?
Often, yes. Small existing pieces can frequently be absorbed into the background or worked around, while larger or darker ones set boundaries the new design must respect. Bring clear, well-lit photos of everything on the arm to your consultation. Your artist can then tell you honestly what can be incorporated and what will limit the composition.
If you are planning a Japanese sleeve tattoo in Singapore, the fastest way to get a real answer is to message Yuyi on WhatsApp with photos of your whole arm, any existing tattoos, your main motif and your preferred coverage. The studio is at 388A Geylang Road and displays 24-hour opening, but do confirm a consultation time by WhatsApp before you visit.