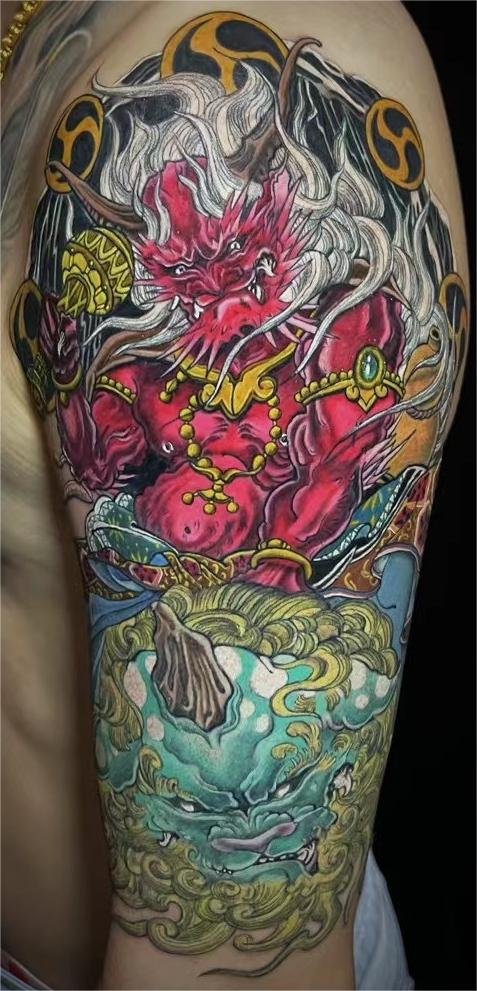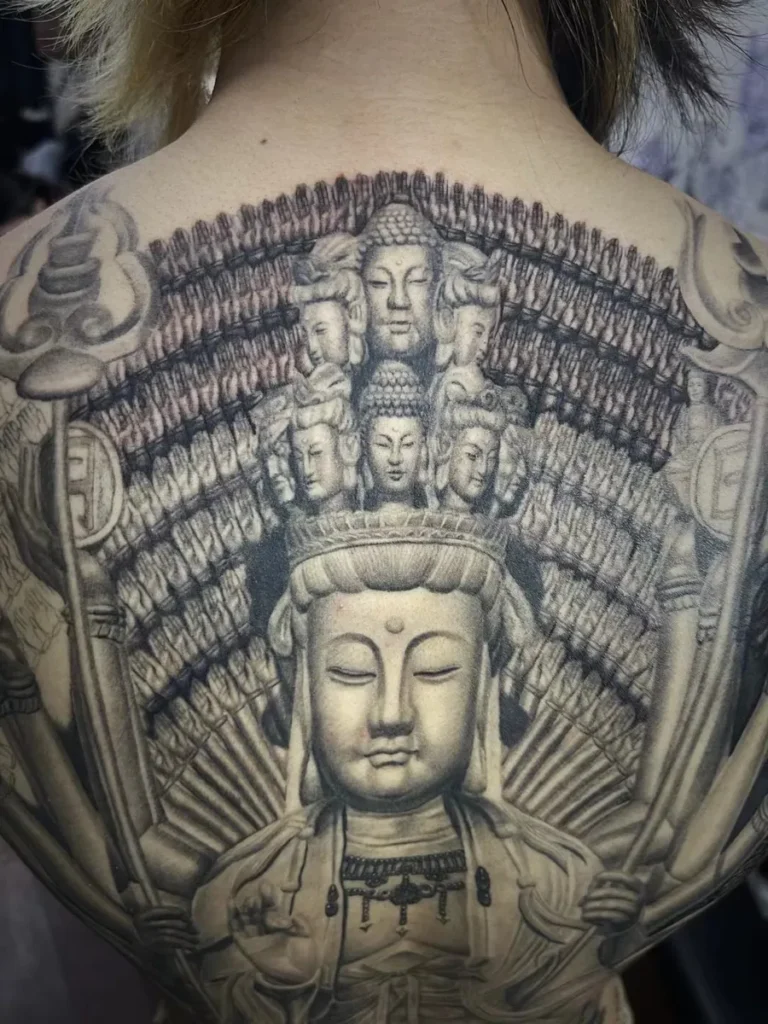
A Japanese back piece tattoo should be planned around one dominant subject, a readable pose and background fields that connect the composition across the shoulders, spine and lower back. The central motif establishes the story and silhouette. Supporting flowers, water, clouds, rocks or wind need clear roles, while the background carries direction and keeps the parts from reading as unrelated images.
Start with the whole back rather than a collection of close-up details. Decide what the viewer should recognise first from a normal standing distance, where that subject sits on the spine axis, how its mass uses the shoulder width and what continues toward the waist or hips. Detail comes after this architecture is stable.
The historical frame matters, but it is not a template
The Asian Art Museum describes how large-scale, densely composed pictorial tattoos developed in nineteenth-century Japan alongside woodblock prints of tattooed heroes. Its exhibition on tattoos in Japanese prints also shows that artists worked with figures, dragons, lions, peonies, snakes and other subjects that already carried literary and visual contexts. The Japanese American National Museum connects traditional Japanese tattooing to ukiyo-e while presenting a broad range of modern practice and offshoots.
These sources establish an art-historical relationship; they do not supply one universal layout for every modern client. A print is a bounded sheet. A back is a curved, moving body surface. A historical motif also cannot be detached from its source and assigned a convenient meaning without checking context.
For planning, use museum material to understand visual vocabulary, period and source. Use a tattoo consultation to decide how a chosen subject can be redrawn for a particular back. The Japanese and Asian-inspired tattoo page shows the confirmed Yuyi portfolio direction without claiming that every Asian subject belongs to one tradition.
Give one subject control of the back
The central motif needs more than a name. “Dragon,” “warrior,” “tiger” or “guardian figure” still leaves the important design questions unanswered. Define the action, view and emotional register:
- Is the body rising, descending, turning or holding its ground?
- Is the face frontal, in profile or at a three-quarter angle?
- Does the pose open across both shoulder blades or coil around the spine?
- Which feature must remain readable from several steps away?
- Is the subject calm, severe, forceful or protective in your intended reading?
The pose controls the outer silhouette. A long, flexible animal may travel in an S-shaped route, while a standing figure may build a more vertical structure. A mask or head study may occupy the upper centre and require supporting shapes below. None of these choices is inherently more authentic. The right one depends on the source, body area and visual priority.
A useful first test is to reduce the idea to a dark silhouette. If the main subject disappears when colour, scales, fabric and facial detail are removed, it may not yet control the composition. Reworking the pose at this stage is easier than trying to rescue hierarchy with extra background later.
Use the shoulders as width, not as two separate panels
The upper back offers the broadest horizontal span, but the shoulder blades create two moving planes. A central motif can use that width without placing one equal object on each side. Symmetry may suit an architectural or mask-led design; a figure, dragon or tiger may read better with an uneven distribution of mass and a deliberate counterweight.
The upper corners also affect the first impression. A large subject that stops abruptly inside both shoulder blades can look boxed in. Background movement, foliage or part of the main silhouette can guide the eye outward, provided the edges are intentional. If the design may later connect toward the rear shoulder or upper arm, that possibility should be discussed before a hard border closes the route.
Shoulder position changes the surface. The NCBI anatomy reference describes the scapula as a flat triangular bone involved in protraction, retraction, elevation, depression and rotation. Tattoo planning does not require a medical diagram, but it does require views with the arms relaxed and raised. A line that looks level in a stretched photograph may sit differently in an ordinary standing posture.
Treat the spine as an axis, not a compulsory seam
The spine gives the back a strong centre reference. A face, sword, waterfall, body line or band of open skin may align with it, cross it or sit deliberately off-centre. The important point is that the choice should look intentional.
Centred does not always mean mirrored. A dragon can cross the midline several times while the composition remains balanced. A warrior may stand slightly to one side if a weapon, robe or background field carries weight to the other. A waterfall may descend near the centre while waves spread unevenly toward the flanks.
Check the spine axis in three ways:
- Straight-on: Does the main subject feel stable when both sides of the back are visible?
- Three-quarter view: Does the subject retain a clear face or leading edge when one side turns away?
- Forward reach: Do important features distort or collide when the shoulder blades spread?
The axis should organise the design without making the entire tattoo depend on one perfectly still pose.
Supporting motifs need a compositional job
Supporting elements are not a second wish list. Each one should solve a visual or contextual problem. Flowers can soften a hard transition, establish a seasonal reference where the source supports it or create an alternate scale beside a large figure. Rocks can anchor weight. Water can establish a low, forceful direction. Clouds can open distance around an airborne or elevated subject.
Before adding an element, complete this sentence: “It belongs here because it helps the composition to…” If the answer is only “fill a gap,” the gap may be valuable negative space. If the answer is “balance the upper-right mass,” “carry movement below the figure” or “separate the face from a dark field,” the element has a clear task.
Motif relationships also deserve source checking. A pairing seen in one print, story or period should not be treated as a timeless rule for all Japanese imagery. Bring the exact visual or literary reference and explain what you want to preserve. The artist can then distinguish a historical relationship from a contemporary personal combination.
The background is the connective structure
In a Japanese back composition, waves, clouds and wind-shaped fields are more than decoration around a finished subject. They determine direction, separation and continuity. The guide to Japanese tattoo backgrounds explains those elements individually; on the back, the key question is how they connect one large canvas.
Plan the background as broad fields before drawing small curls, spray, cloud edges or bars. A few major routes should be visible:
- an upper route that uses the shoulder width;
- a central route that moves around or behind the main subject;
- side routes that prevent the composition from ending as a narrow rectangle;
- a lower route that settles or continues toward the waist and hips.
Foreground and background need enough separation to remain legible. If a dark tiger, dark rocks and dense black wind all meet at the same edge, the silhouette can disappear. Open skin, a lighter field or a change in direction can create a boundary without outlining every component twice.
Background continuity does not require identical marks everywhere. Water low on the composition and clouds high on it may create a coherent vertical world. The transition between them should be planned rather than patched with neutral filler.
Design the lower-back transition before it becomes an ending
The lower back narrows compared with the shoulders, then changes again toward the hips and sides. A composition that is full and expansive above can become cramped if every remaining motif is forced into the final section. Decide whether the design should taper, settle into a strong base or keep open routes for a possible extension.
A tapered ending may use a diminishing background rhythm and deliberate open skin. A grounded ending may use rocks, waves, fabric or another low visual mass that belongs to the subject. An extendable ending avoids a decorative border that would be difficult to cross later.
This does not mean every back piece should become a Japanese body suit tattoo. It means the edge should reflect the actual scope. If the project stops at the waist, design a convincing stop. If the client is only considering future connections, preserve options without presenting any extension as booked, available or required.
Check the composition at three distances
At long distance, the outer silhouette and direction should be clear. At conversational distance, the central motif, supporting forms and background relationship should separate. Close up, line, texture and smaller references can reward attention.
This order prevents detail from becoming the main planning method. A beautiful eye, scale or flower does not correct a weak full-back silhouette. Conversely, a broad, readable layout can still carry detailed rendering where the body area and contrast plan support it.
Use plain greyscale or simplified colour studies early. They reveal whether one side is much heavier, whether the face sits inside a dark pocket and whether the lower section has become a pile of leftovers. Final palette decisions can follow once the structural read is sound.
Prepare a Japanese back-piece brief
Send information that supports the architecture:
- clear photographs of the full back with arms relaxed, raised and reaching slightly forward;
- one named central subject with an exact source or reference context;
- the pose or direction you prefer;
- supporting motifs divided into essential and optional;
- whether the design should stop at the waist or preserve a possible route beyond it;
- colour or black-and-grey references, labelled for finish rather than copying;
- existing tattoos, scars or fixed boundaries visible in normal photographs.
The general full-back tattoo planning guide covers silhouette, viewing distance and staged project questions. The large-scale tattoo page shows how to begin a body-plan discussion. This article owns the narrower Japanese composition problem: how central motif, support and background operate across the back canvas.
When the brief is ready, contact Yuyi Tattoo with the original references and placement photos. Yuyi Tattoo’s documented portfolio includes Japanese and Asian-inspired compositions and large back pieces. Each new project still needs individual review; a message does not confirm price, session count, schedule, artist availability or outcome.
Sources and review date
- Asian Art Museum: Tattoos in Japanese Prints | reviewed 24 August 2026.
- Japanese American National Museum: Perseverance, Japanese Tattoo Tradition in a Modern World | reviewed 24 August 2026.
- The Japan Foundation, Sydney: Uncovering Japanese Tattoo | reviewed 24 August 2026.
- NCBI Bookshelf: Anatomy, Back, Scapula | reviewed 24 August 2026.
Frequently asked questions
What should be the central motif in a Japanese back piece tattoo?
Choose a subject you can define by source, pose and priority, not only by name. It should create a readable silhouette across the back and leave supporting elements with secondary roles. The best choice depends on the reference context, intended visual tone and the shape of the client’s back.
Does the main subject have to sit exactly on the spine?
No. The spine is a useful axis, but the subject can cross it or sit off-centre if another form balances the composition. Check the design straight-on and at three-quarter angles so an intentional asymmetry does not look like accidental drift.
Are waves, clouds and wind bars just background filler?
They should not be treated that way. Background fields guide movement, separate the central motif and connect the shoulders to the lower back. Planning them early usually produces a more coherent result than adding them after every foreground element is fixed.
Should a Japanese back piece end at the waist?
That is a scope decision, not a universal rule. A waist ending can taper, form a grounded base or leave an open route for a possible future connection. State the intended boundary before the composition is drawn so the lower section has a deliberate finish.
How many references should I send for a Japanese back piece?
Send a compact set with distinct roles: one reliable source for the central subject, one for pose, one for background direction and one for finish or palette. Add full-back placement photos. More images help only when they resolve different decisions rather than introducing competing versions of the same motif.