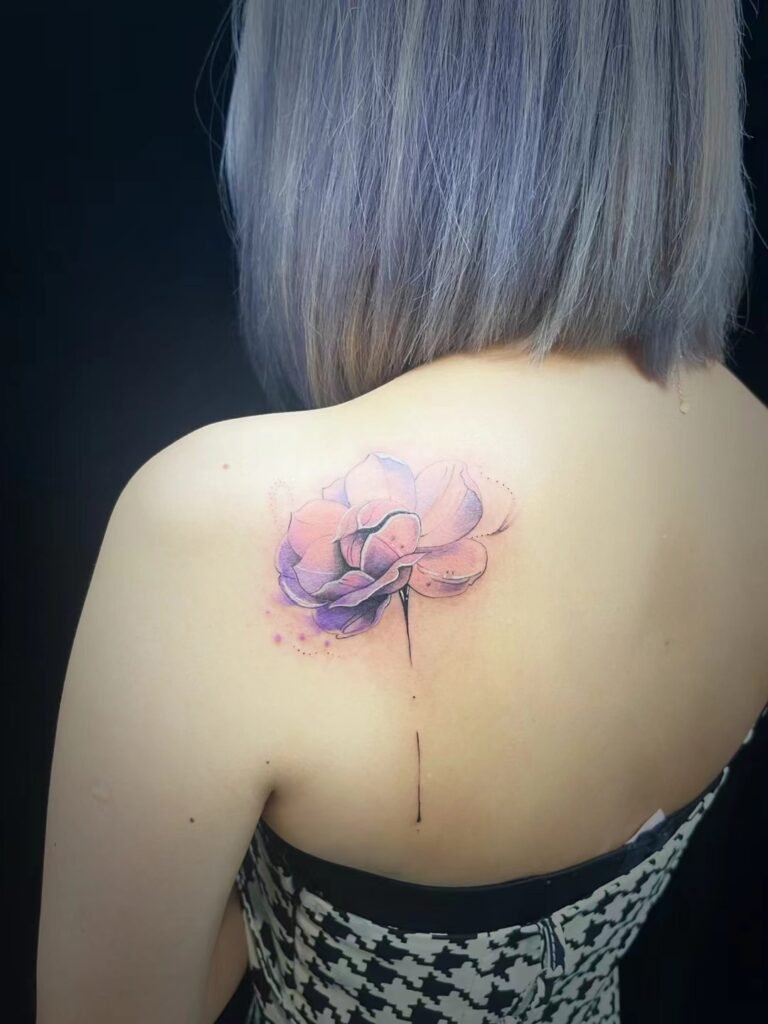
A useful shoulder blade tattoo placement guide starts with the arms relaxed, because that is how the design will usually be seen. The same layout should then be checked with the arm reaching forward, lifted to shoulder height and raised overhead. The scapula moves with the shoulder, so a tattoo placed only from a stretched pose may sit differently in an ordinary standing view.
Choose a primary orientation, decide whether the design belongs inside one shoulder blade or connects toward the spine and rear shoulder, and test the actual straps and clothing that matter to you. If a larger back piece may be considered later, keep at least one compositional route open rather than surrounding the first tattoo with a hard border.
What the shoulder blade area actually does
The scapula is the flat, triangular bone commonly called the shoulder blade. It sits on the back of the upper ribcage and forms part of the shoulder girdle. The NCBI anatomy reference describes six scapular motions: protraction, retraction, elevation, depression, upward rotation and downward rotation. Another NCBI shoulder reference explains that arm movements involve the scapula, clavicle and upper arm working together rather than one isolated joint.
For tattoo planning, the practical point is simple. The visible surface changes when you reach forward, pull the shoulders back, shrug or lift the arm. Skin and muscle move over and around the bony landmarks. A circle can appear round in one pose and slightly skewed in another. A straight line can tilt. Part of a figure may disappear toward the side when the shoulder turns.
This does not make the placement unstable or unsuitable. It means one pose has to be declared the main reading, while other poses are used to check whether the distortion remains acceptable. Every tattoo on a moving body changes to some degree; the shoulder blade makes that movement easy to overlook because it appears broad and flat when the client stands still.
Define the placement with boundaries, not a dot
“On my shoulder blade” can mean several different locations. The design might sit high near the rear shoulder, close to the spine, low near the inferior point of the scapula or wide enough to cross onto the side of the upper back. A centre mark alone does not explain its edges.
Describe four boundaries:
- the upper edge in relation to the shoulder seam or base of the neck;
- the inner edge in relation to the spine;
- the outer edge in relation to the rear shoulder or side of the torso;
- the lower edge in relation to the bottom of the shoulder blade or clothing line.
Ordinary language is enough. “Right upper back, mostly inside the shoulder blade, two fingers from the spine, with the lower point ending above my usual bra band” is more useful than an uncertain anatomical term. The guide to describing tattoo placement explains how to combine side, surface, landmarks, direction and measurements.
Mark the intended boundary on an unfiltered photo with a removable visual overlay or digital line. Do not pull the skin flat for the picture. Include enough surrounding back and shoulder that the artist can see the relationship to the spine, neck and arm.
Decide which way the design should read
Shoulder blade orientation can be vertical, diagonal, horizontal or centred around a compact shape. Each produces a different relationship with the back.
A vertical design can follow the space between the inner shoulder blade and the spine. It may suit a long flower, bird, blade, figure or abstract mark. A diagonal design can travel from the lower inner area toward the rear shoulder, creating a sense of lift or flight. A horizontal design can use the upper-back width but may begin to behave more like an upper-back composition than a single shoulder-blade piece.
For a face, animal or directional motif, replace “inward” and “outward” with a destination. Should the subject face the spine, the rear shoulder, the neck or the arm? Those descriptions remain clear in a photograph, while inward can mean something different depending on the viewer.
Orientation also changes with the intended audience. A centred emblem may be designed to read in a straight back view. A creature crossing the rear shoulder may reveal itself mainly from a three-quarter view. Choose that main view before interior detail is approved.
Use the relaxed pose as the home position
Take the first assessment photo standing naturally, with the hands loose and shoulders neither pulled back nor rounded forward. This is the home position. It shows how the tattoo will sit during ordinary standing and walking better than a pose chosen to make the back look wider.
Then compare three movement views:
- Arms forward: shows how the shoulder blades spread when reaching or lightly hugging the torso.
- Arm at shoulder height: shows outward movement and rotation without the extreme of a full overhead reach.
- Arm overhead: shows how the scapula rotates and how the upper edge travels toward the neck and shoulder.
The goal is not to find a design that looks identical in every frame. That is unrealistic. Look for specific failures: an eye folding into an edge, a circle becoming unreadable, a line that points in an unintended direction or an important face vanishing around the rear shoulder.
If the proposed image is highly geometric, symmetrical or text-based, small changes may be more noticeable. Organic subjects such as foliage, cloud, fabric or an animal in motion can sometimes absorb movement more naturally. That is a composition observation, not a rule that one category is always better.
Design across the scapula, not from a flat rectangle
The shoulder blade can look like a convenient rectangular panel in a rear photograph. Its actual useful surface is tapered and connected to several directions. The upper outer area turns toward the shoulder cap. The inner edge approaches the spine. The lower point narrows into the mid-back.
A compact motif can stay within the main visible plane. A larger subject can use the taper by placing a broad form above and a narrower tail, stem or background route below. A diagonal composition can let the lower inner area counterbalance the upper outer area.
Avoid placing every essential feature along one bony edge. If a face, lettering line or geometric centre sits exactly where the surface changes most in your movement views, slight rotation may dominate the design. Shift the focal feature toward a calmer part of the main viewing plane and let secondary forms cross the more active edges.
A stencil or placement mock-up should be judged from the full back, not only from a close phone photograph. Step back, check the three-quarter view and let the arm rest. The tattoo belongs to the body outline as well as to the marked patch of skin.
Straps and clothing are part of placement planning
Clothing affects visibility and contact, but coverage cannot be predicted from a generic diagram. Necklines, shoulder seams, bra straps, sports tops, backpack straps and work garments sit differently on each person and shift during movement.
Use your own wardrobe before settling the boundaries. Photograph the relaxed back in the garments that matter most, then mark where the proposed tattoo would begin and end. Check at least one everyday top, one formal or work option if relevant and the strap arrangement you use regularly. If discretion matters, test movement instead of relying on a still mirror view. A design hidden by a collar while standing may appear when reaching forward.
Decide whether a strap crossing the design is acceptable. Some clients prefer the tattoo fully inside or outside a common strap line. Others do not mind partial coverage and care more about the composition without clothing. There is no universal right answer.
Keep pre-tattoo visibility planning separate from aftercare. A garment that creates the desired coverage may not be the garment recommended around newly tattooed skin. Follow the artist’s current, project-specific care instructions and seek qualified medical advice for health concerns rather than treating this placement article as a healing schedule.
Plan the edge if the tattoo may grow later
An isolated shoulder blade tattoo can have a complete border. A tattoo that may later connect across the upper back, spine, rear shoulder or arm needs a different edge strategy. Dense frames, hard circles and symmetrical ornamental borders can make later expansion look attached rather than integrated.
You do not need to commit to a full back piece to preserve an option. Identify one or two possible exits:
- toward the spine for a wider upper-back composition;
- toward the rear shoulder for a connection around the shoulder cap;
- downward for a longer back or rib route;
- across the upper back for a paired or panoramic design.
Leave open skin or a soft secondary form at those edges. If the existing tattoo must remain visually complete forever, design the border confidently. If expansion is a genuine possibility, say so before the first layout is final.
The full-back tattoo planning guide covers focal hierarchy, silhouette and body-wide transitions. A shoulder-to-chest tattoo design solves a different route around the front of the shoulder. A shoulder blade piece should not be pushed toward the chest unless that connection is part of the actual scope.
Pain is not a reliable placement grid
Shoulder blade tattoo pain cannot be reduced to one score. Sensation varies among people, and even one proposed design may cross bony, muscular and side-back areas. Position, duration, stress, prior experience and the exact work being done can also affect how a session feels.
Do not choose the exact boundary from an online number. Compare the visual result, clothing needs and future expansion first, then discuss comfort concerns with the artist. If you have a medical condition, skin concern or shoulder problem, ask an appropriate healthcare professional about medical suitability.
The spine and back tattoo pain guide addresses the broader sensation and session-planning questions. It still cannot predict an individual’s experience or set a universal time, break pattern or healing period.
Send four useful placement photos
Ask someone else to take the photos when possible. Selfies often twist the torso and raise one shoulder. Use even lighting and keep the camera far enough away to show the neck, both shoulders, spine and upper waist.
Send:
- a straight back view with arms relaxed;
- a three-quarter view from the proposed side;
- a back view with both arms reaching forward;
- a back view with the proposed-side arm raised overhead.
Add one clothing or strap photo only when coverage is part of the decision. Mark the proposed boundary on a duplicate, but include the original unmarked image as well. State “my left” or “my right” in text because mirrored previews can cause confusion.
Your first message can read:
Placement: my right shoulder blade. The design should read mainly when my arms are relaxed, with the top below my usual shoulder seam and the inner edge clear of the spine. I prefer a diagonal direction toward the rear shoulder. I may consider an upper-back extension later, so please avoid a hard border on the inner edge. I have attached relaxed, three-quarter, forward-reach and overhead views.
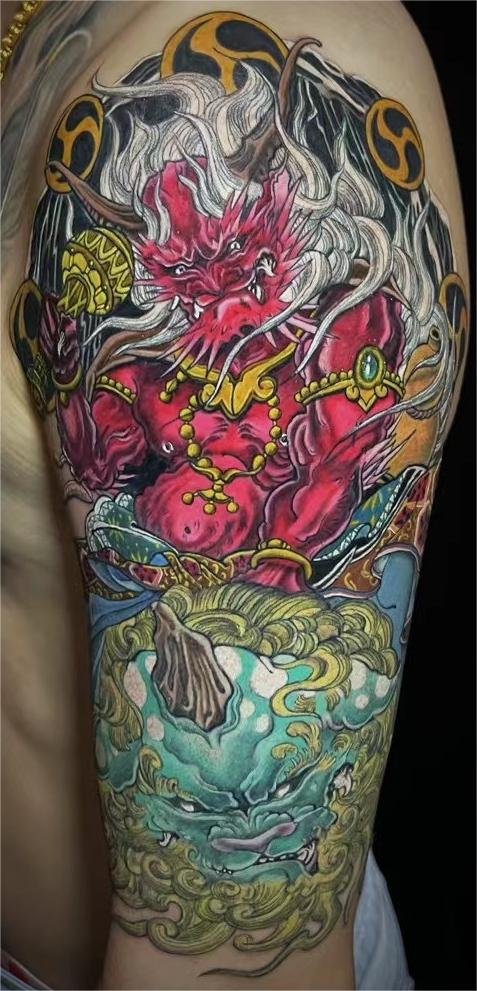
When the placement views and references are ready, contact Yuyi Tattoo for a project-specific assessment. The documented portfolio includes large back pieces and sleeves, but every new design, size, schedule, price and artist assignment still needs written confirmation.
Sources and review date
- NCBI Bookshelf: Anatomy, Back, Scapula | reviewed 24 August 2026.
- NCBI Bookshelf: Anatomy, Shoulder and Upper Limb, Shoulder | reviewed 24 August 2026.
- InformedHealth.org via NCBI Bookshelf: How Does the Shoulder Work? | reviewed 24 August 2026.
Frequently asked questions
Where should a shoulder blade tattoo sit?
It can sit high, low, close to the spine or toward the rear shoulder. Define the upper, inner, outer and lower boundaries rather than naming only the centre. Choose a home view with the arms relaxed, then check how those boundaries shift as the arm moves.
Should the design be checked with my arm raised?
Yes, but the raised pose should usually be a movement check rather than the only placement view. Start relaxed, then compare forward reach, shoulder-height and overhead positions. The design does not need to look identical; important features should remain understandable.
Which direction should an animal or face point on the shoulder blade?
There is no universal direction. State whether it should face the spine, neck, rear shoulder or arm in the relaxed view. Compare the straight-back and three-quarter silhouettes so the chosen direction supports the body rather than an isolated flat drawing.
Will a bra strap or backpack strap cover the tattoo?
Only your actual garments and movement can answer that reliably. Photograph the proposed boundary with the straps you use, then reach and turn to see how coverage changes. Decide whether full, partial or no strap overlap is acceptable before final placement.
Can a shoulder blade tattoo become part of a full back piece later?
It can be planned with that possibility, but integration is not automatic. Preserve an open route toward the spine, upper back or lower edge and avoid a hard frame where future work may connect. Show the existing tattoo and intended scope when any extension is assessed.