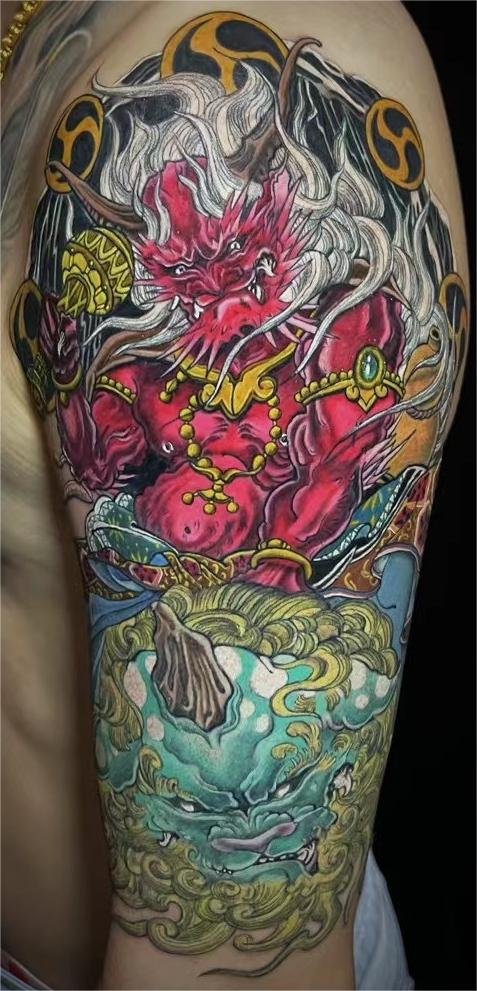
Chest to sleeve tattoo planning is mainly a turning problem. The design has to read across the chest when viewed from the front, then survive the change of angle over the shoulder cap and continue down the arm without becoming two separate tattoos that simply touch at the edge.
The cleanest projects decide three things early: what belongs to the chest panel, what belongs to the sleeve, and what crosses the shoulder. The shoulder should not be treated as empty filler. It is the bridge between two different viewing planes, so it needs its own flow, spacing and overlap.
Start with how the body will be viewed
A chest-to-sleeve tattoo is not seen from one angle. Someone sees the chest when you face them, the sleeve when your arm is relaxed, and the shoulder transition when you turn slightly. If the design only works in one photo, it will not feel settled in real life.
The planning conversation should test at least four views:
- Front view, arms relaxed, so the chest panel and shoulder line are visible together.
- Three-quarter view, where the chest starts to disappear and the shoulder becomes the dominant turn.
- Side view, where the sleeve should read without needing the chest to explain it.
- Arm slightly lifted or moved forward, so the artist can see whether the bridge collapses or stretches awkwardly.
This is a design check, not an anatomical guarantee. The shoulder is a highly mobile region with several joints and muscles contributing to motion, so a tattoo that crosses it should be designed with movement in mind. The artist still has to assess the individual body in person or from clear placement photos.
Decide which part leads: chest panel or sleeve
A chest panel tattoo and a sleeve can both be powerful, but they cannot both shout at the same volume. One part should lead and the other should support it. If the chest holds the main figure, the sleeve can carry secondary forms, background, fabric, smoke, waves or smaller motifs. If the sleeve holds the main subject, the chest can act as an opening panel that frames the shoulder and gives the design somewhere to begin.
The mistake is to place a full chest composition and a full sleeve composition next to each other with no hierarchy. The result may contain a lot of work, but the eye has no route. It stops at the chest, restarts at the arm, and treats the shoulder as a seam.
A simple test helps: from a distance, where should someone look first? If the answer changes every time you look at the reference, the design needs editing. A strong sleeve and chest composition should have a first read, a second read and a place where the eye can rest.
The shoulder is the hinge, not the leftovers
The shoulder cap is where many chest-to-sleeve projects become weak. It is tempting to finish the chest, finish the upper arm, and then fill the rounded shoulder with whatever space remains. That approach usually creates a patch at the most visible transition point.
Instead, the shoulder should be planned as the turning zone from the beginning. It can carry:
A structural overlap
Part of a wing, robe, wave, smoke path, cloud, hair, floral mass or animal body can cross from the chest onto the shoulder. This tells the viewer that the two areas belong to one design. The overlap should be large enough to read from a normal viewing distance, not just as a small decorative connector.
A direction change
The chest is a broad front plane. The arm is a cylinder. The shoulder must rotate the design from one plane to the other. Lines that run straight across the chest may need to curve or break as they pass the deltoid so they do not look pasted on.
A controlled empty area
Not every centimetre needs ink. Negative space around the collarbone, upper chest or top of the shoulder can make the bridge clearer. Empty skin is useful when it separates the main subject from supporting background and keeps the transition from turning into a dark knot.
Chest landmarks are visual guides, not promises
The collarbone, sternum, pectoral edge, armpit line and shoulder cap are useful visual landmarks. They help place a chest panel and decide where the design should stop, taper or turn. But they should not be used as rigid borders. Bodies are not symmetrical diagrams, and posture changes how those landmarks appear.
For example, a central chest element may align visually with the sternum, while supporting forms can drift toward one shoulder. A design that crosses the outer chest has to consider the armpit area without forcing detail into a tight crease. A sleeve that begins at the shoulder has to look complete when the arm hangs naturally, not only when the client poses for a stencil photo.
This is why clear placement photos matter. A useful chest-to-sleeve brief includes the front torso, both side angles and the full arm. For larger projects, the large-scale tattoo planning page explains how placement, scale and references should be prepared before a quote is discussed.
Continuity can come from shape, value or background
Continuity does not always require one literal object crossing the shoulder. A chest-to-sleeve tattoo can be unified in several ways.
One route is shape continuity. The same curve, diagonal or silhouette moves from the chest into the arm. This works well for animals, robes, wings, smoke, waves and botanical forms. The viewer does not need to identify every detail; the large shape tells the eye where to go.
Another route is value continuity. In black-and-grey work, the darkest areas, midtones and softer grey passages can be arranged so the eye moves smoothly across the shoulder. This is especially useful when the subject is realism-influenced and cannot rely on bold outline alone. If you are considering that route, review the black-and-grey tattoo work to see how contrast and value carry large images.
A third route is background continuity. Wind, smoke, water, clouds, fabric, petals or abstract texture can connect a chest panel to a sleeve while allowing the main subjects to stay separate. The key is consistency. Background added as an afterthought often looks like filler; background planned from the start becomes structure.
How to keep the arm readable on its own
Even when the chest and sleeve are connected, the arm still needs to read independently. Most people will see the sleeve more often than the chest, especially in everyday clothing. If the arm only makes sense when the chest is visible, the project becomes hard to understand most of the time.
A sleeve section should have its own visible focal point or clear directional flow. It can point back toward the chest, but it should not depend entirely on the chest. The forearm, if included, needs its own hierarchy because it is seen from several angles and may be the only part visible in daily life.
The same applies to the chest. A chest panel should not look like the missing top of a sleeve when the arm is covered. It can remain open at the shoulder, but the main silhouette should still feel intentional.
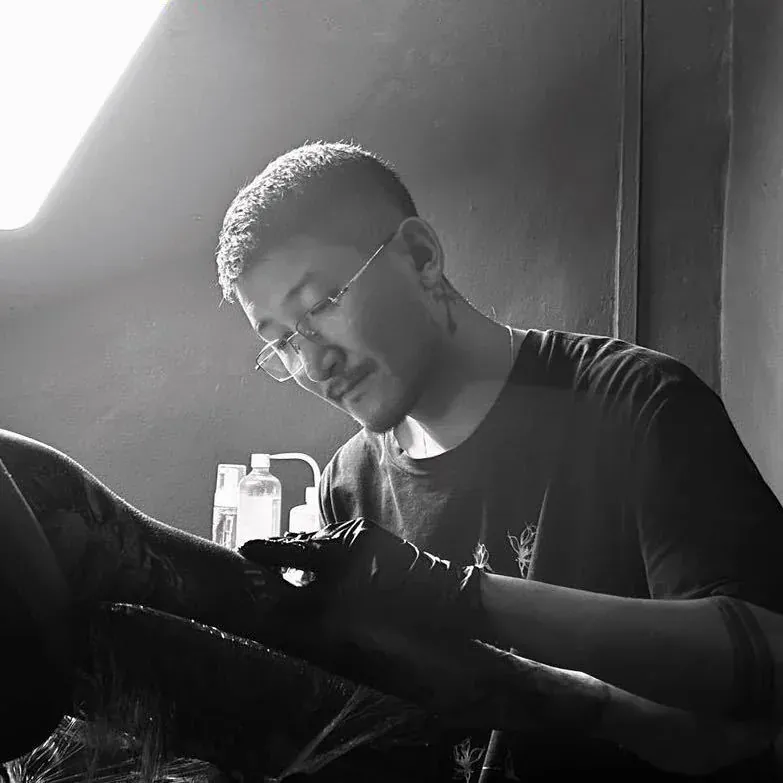
You can view Yuyi Tattoo’s portfolio for examples of large subjects, value control and body placement. Use the examples to talk about direction, density and mood, not to copy a finished client design.
Brief checklist for a chest-to-sleeve project
Before asking for design feedback, gather the information that lets the artist see the turn.
- Front torso photo from collarbone to lower chest, standing naturally.
- Left and right side photos so the shoulder cap and upper arm are visible.
- Full arm photos if the sleeve may extend beyond the upper arm.
- Existing tattoos near the chest, shoulder, upper arm or inner arm.
- The main subject and whether it belongs mainly on the chest, mainly on the sleeve, or across both.
- Style direction: black and grey, colour, Japanese-inspired, realism-influenced, illustrative or still undecided.
- Visibility limits: whether the design must stay under a shirt line or may cross it.
When those pieces are ready, contact Yuyi Tattoo with the brief. The studio address is Geylang, Singapore. WhatsApp enquiries can be sent to +65 9128 0501.
Sources and review date
- NCBI Bookshelf — Anatomy, Shoulder and Upper Limb, Shoulder — reviewed 24 August 2026.
- NCBI Bookshelf — Anatomy, Shoulder and Upper Limb, Glenohumeral Joint — reviewed 24 August 2026.
Frequently asked questions
Should the chest or the sleeve be planned first?
Plan the connection first, then decide which side leads. If the chest is the main panel, the sleeve should support and extend it. If the sleeve is the main read, the chest should frame or open it. Planning one side completely before thinking about the other often creates a weak shoulder join.
Does a chest-to-sleeve tattoo need to be symmetrical?
No. Symmetry can work for some chest concepts, but a chest-to-sleeve design is often stronger when it uses controlled asymmetry. The important point is balance: the chest, shoulder and arm should feel related even when the visual weight is not equal on both sides.
What should cross the shoulder?
Large connecting forms work better than tiny detail. Smoke, waves, fabric, flowers, hair, wings, armour, background or part of the main subject can cross the shoulder. The crossing element should be readable enough to make the chest and sleeve feel like one composition.
Can I add the chest later to an existing sleeve?
Sometimes, but it depends on how the top of the sleeve was finished. If the shoulder edge is closed and dense, adding a chest panel later can look forced. If the sleeve has open background or a clear directional exit, the chest can often be planned more naturally.
How do I avoid a hard seam at the shoulder?
Avoid treating the shoulder as leftover space. Decide the overlap, value transition or background route early. Check the design from front, side and three-quarter views, and make sure the sleeve still reads when the chest is covered.